
Before starting, turn off the power at the breaker and verify the circuit is dead with a voltage tester. Remove the existing fixture carefully and check your new fixture’s compatibility and weight. Connect the wires securely—black to black, white to white, and ground to ground—using wire nuts. Attach the fixture, tighten all screws, and restore power to test. For detailed steps and safety tips, continue with the full instructions to guarantee a safe and proper installation.
Key Takeaways
- Turn off power at the circuit breaker and verify the circuit is dead before beginning installation.
- Check fixture compatibility, and ensure the electrical box and wiring support the new fixture.
- Carefully remove the old fixture, disconnect wiring, and inspect for damage or corrosion.
- Attach the mounting bracket, connect wires securely (black to black, white to white, ground to ground), and mount the new fixture.
- Restore power, test the fixture, and ensure all connections are secure and functioning properly.
Installing a new light fixture can brighten up your space and improve its overall look, but safety should always come first. Before you start, verify you understand basic electrical safety practices. Turn off the power at the circuit breaker and double-check that the circuit is dead using a voltage tester. This step is vital to prevent electrical shock or injury. If you’re unsure about working with electrical wiring or if the existing wiring looks damaged or outdated, don’t hesitate to consult a professional electrician. Remember, working with electricity carries risks, so taking the proper precautions is essential.
Next, check the fixture compatibility with your fixture’s electrical box and your home’s wiring system. Not all fixtures are designed to fit every box or match every wiring setup. Look at the weight of the fixture; heavy fixtures may require a more secure, rated support brace. Verify that the fixture’s wattage and voltage are suitable for your electrical system to avoid overloading circuits, which can cause fires or frequent breaker trips. Read the manufacturer’s instructions carefully—most fixtures come with specific guidance on installation and compatibility. Matching the fixture to your existing setup ensures safe operation and helps prevent issues down the line.
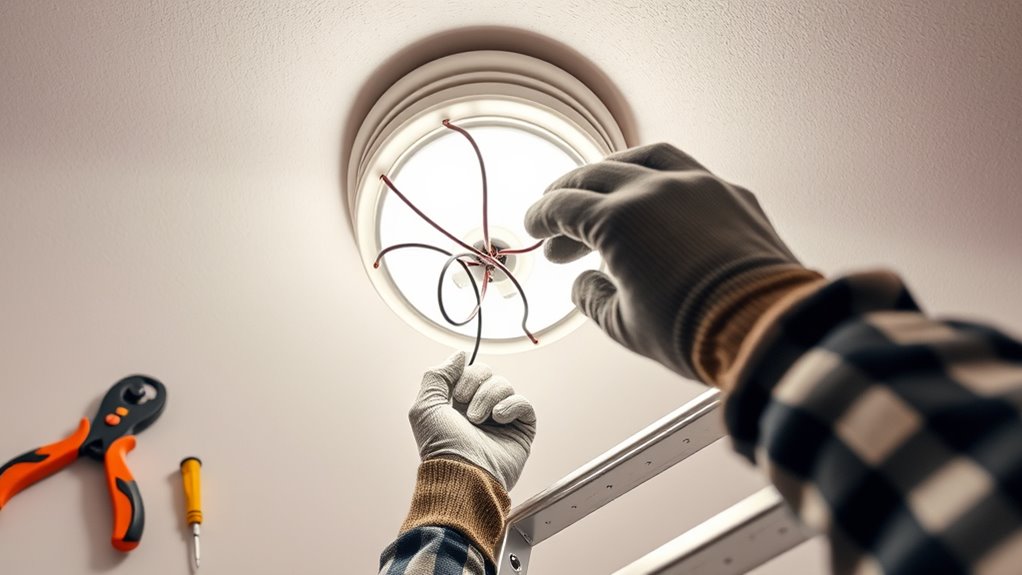
Once you’ve confirmed safety and compatibility, remove the old fixture carefully. Unscrew any mounting screws, disconnect the wiring, and support the fixture as you detach it from the ceiling. Keep track of all hardware and parts; this will make installing the new fixture smoother. If your old fixture is hard to remove or if the wiring is stuck, don’t force it. Instead, examine the wiring for any corrosion or damage and address those issues before proceeding.
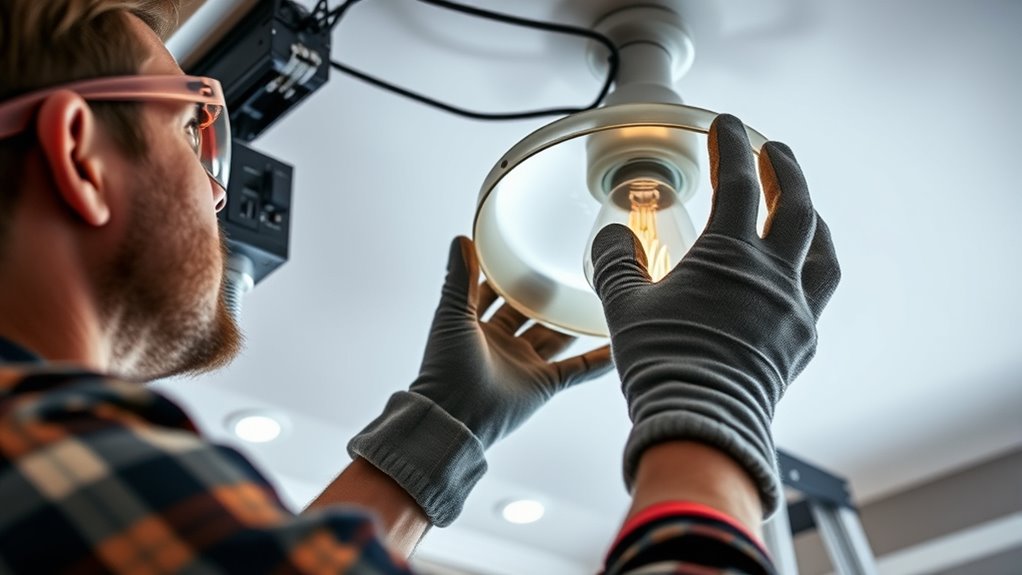
When installing your new fixture, start by attaching the mounting bracket that comes with it to the electrical box. Make sure it’s secure and aligned properly. Connect the fixture wires to the house wires—typically black to black (hot), white to white (neutral), and green or copper to ground—using wire nuts. Be sure to twist the wires tightly and secure them with electrical tape if needed. Proper wire connection is vital for electrical safety and fixture performance. Once wired, tuck the wires neatly into the electrical box and attach the fixture to the mounting bracket. Tighten all screws securely, but avoid overtightening, which can damage the fixture or the electrical box.
Finally, restore power at the breaker and turn on the switch to test your installation. If the fixture lights up correctly and there are no sparks or flickering, your installation is successful. Remember, safety isn’t just about turning off the power—it’s about making sure every connection is secure, compatible, and up to code. When in doubt, consult with a professional to ensure everything is done safely and correctly. Additionally, understanding the importance of electrical safety practices can help prevent accidents during installation.
LED ceiling light fixture
As an affiliate, we earn on qualifying purchases.
As an affiliate, we earn on qualifying purchases.
Frequently Asked Questions
Can I Install a Light Fixture Without Turning off the Power?
You shouldn’t install a light fixture without turning off the power because it jeopardizes electrical safety. Working live exposes you to potential electric shocks or accidents. For safe DIY lighting projects, always switch off the circuit at the breaker box before starting. This simple step protects you and guarantees a safe installation process. Never skip this essential safety measure—your safety depends on it.
What Tools Are Essential for Installing a New Light Fixture?
Imagine you’re installing a new pendant light in your dining room. For this task, you need a tools overview including a screwdriver, wire strippers, and a voltage tester. Safety gear like insulated gloves and goggles is essential to protect yourself. These tools help you disconnect, connect, and secure the fixture properly, ensuring safety and efficiency throughout the installation process. Always double-check your tools and safety gear before starting.
How Do I Determine the Correct Wattage for My Fixture?
To determine the correct wattage for your fixture, start by checking the fixture’s wattage guidelines, which tell you the maximum wattage it can handle safely. Always verify fixture compatibility with your existing wiring and electrical box. Avoid exceeding the recommended wattage to prevent overheating or electrical hazards. If unsure, consult the manufacturer’s instructions or a professional electrician to make certain you choose a safe, suitable light bulb for your fixture.
Is It Necessary to Hire an Electrician for This Task?
You wonder if hiring an electrician’s necessary, and the answer depends on your DIY safety and electrical knowledge. If you’re confident handling wiring safely and understand local codes, you might proceed. But, if there’s any doubt, the risks escalate—shocking accidents or fire hazards. Rushing this decision could be dangerous, so when in doubt, hiring a professional guarantees safety and compliance, avoiding costly mistakes and potential harm.
What Should I Do if the Existing Wiring Is Damaged?
If you find damaged wiring, you should prioritize safety precautions. Turn off the power at the circuit breaker before inspecting. If wiring is frayed or compromised, avoid attempting repairs yourself unless you’re qualified. Contact a licensed electrician to assess and repair the compromised wiring safely. Remember, working with damaged electrical components can be dangerous, so don’t risk injury—let professionals handle the repairs to ensure everything is up to code and safe.
electrical wire nuts
As an affiliate, we earn on qualifying purchases.
As an affiliate, we earn on qualifying purchases.
Conclusion
Now that you’ve installed your new light fixture, remember, you’re like Icarus reaching for the sun—just with a safer outcome. By following these steps carefully, you’ve transformed your space with confidence and skill. Keep safety at the forefront, and you’ll illuminate your home not just with light, but with pride. Just like the dawn dispels darkness, your handiwork brightens your day—proof that a little effort can truly make a world of difference.
light fixture mounting bracket
As an affiliate, we earn on qualifying purchases.
As an affiliate, we earn on qualifying purchases.
voltage tester for electrical wiring
As an affiliate, we earn on qualifying purchases.
As an affiliate, we earn on qualifying purchases.