
TL;DR
Small closet setups work best when you combine absorption, sealing gaps, and smart placement. Moving your rig into a closet or separate room often beats foam alone. Proper ventilation and door treatment matter to keep noise in or out.
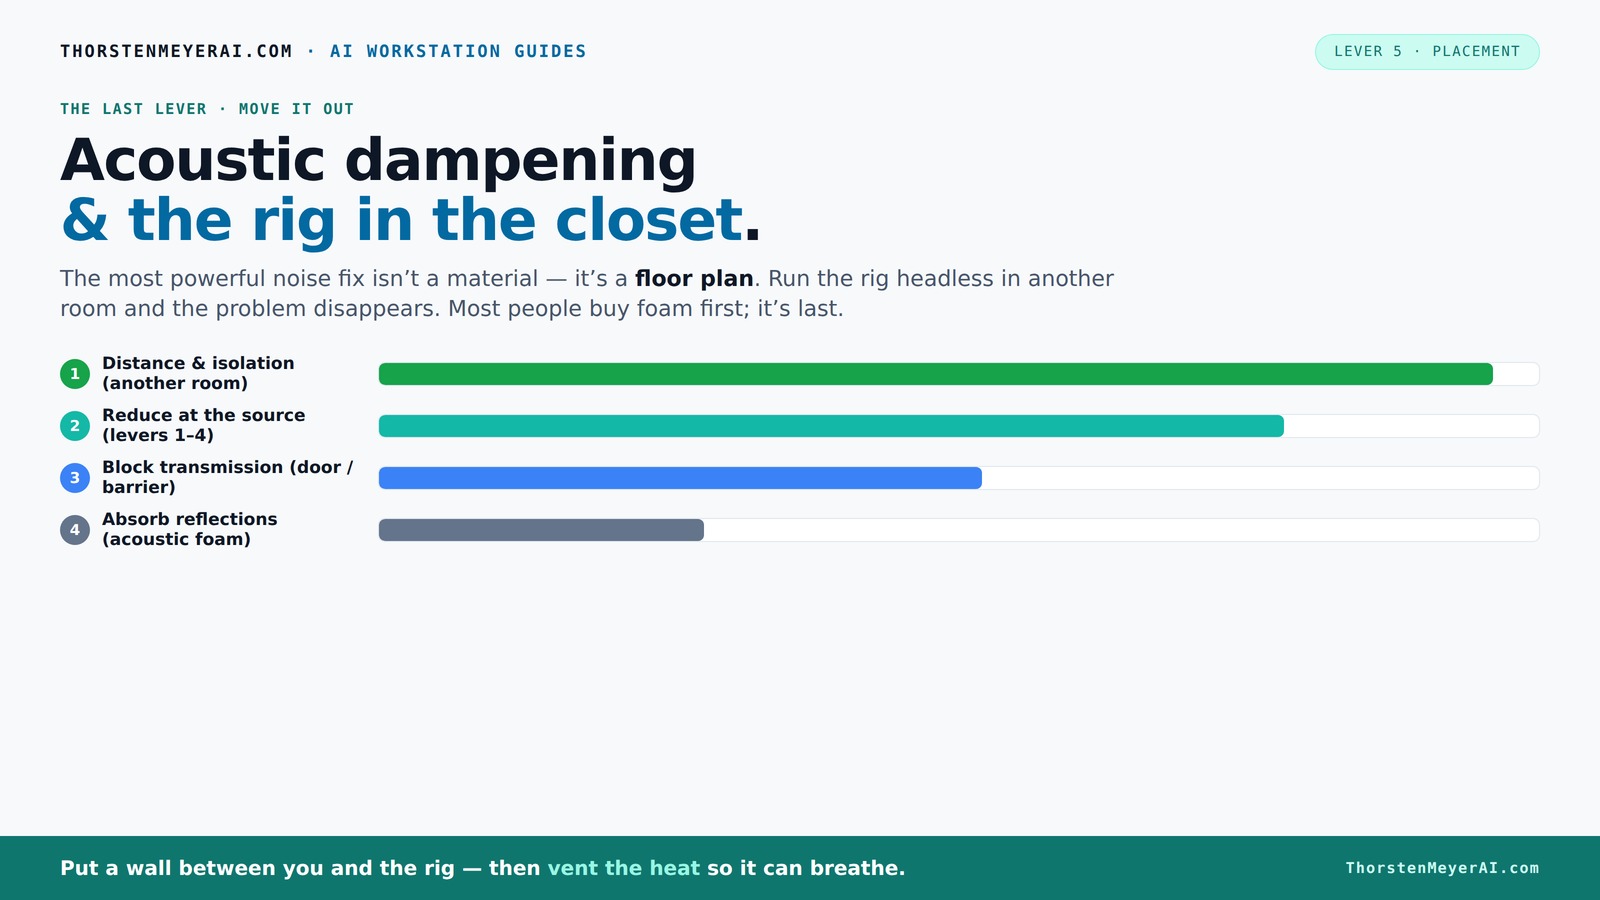
Acoustic dampening
& the rig in the closet.
The most powerful noise fix isn’t a material — it’s a floor plan. A rig you can’t hear because it’s in another room beats any amount of foam. Tap the approaches in Part 1 to see what actually works.
(another room)
(levers 1–4)
(door / barrier)
(acoustic foam)
Contain the noise, not the heat
Key Takeaways
- Sealing gaps around the door and walls makes your room significantly quieter than foam alone. You can learn more about effective acoustic dampening and sealing techniques.
- Moving your rig into a separate room or closet is often the most effective way to eliminate noise issues.
- Placement of absorption panels on reflection points drastically improves sound clarity in small spaces.
- Vibration isolation pads and decoupling prevent equipment noise from radiating through floors and desks.
- Proper ventilation and airflow are critical to prevent overheating when your rig is enclosed.
soundproofing acoustic foam panels for small rooms
As an affiliate, we earn on qualifying purchases.
As an affiliate, we earn on qualifying purchases.
Why Acoustic Dampening Alone Won't Save Your Sound
Acoustic dampening is like adding cushions to a hard chair—nice, but it doesn’t stop noise from escaping or coming in. Foam panels reduce echo and inside reflections, making your recordings clearer. But they don’t block sound passing through walls or doors.
In fact, relying only on foam is like putting a band-aid on a leak. It helps inside your space but won’t stop sound from leaking out or outside noise seeping in. For real soundproofing, you need to seal gaps, add mass, and block transmission.
For example, a creator in a small closet added foam on the walls but left gaps around the door and vents. The noise still escaped, and the room echoed. That’s why understanding the difference between absorption and soundproofing is key.
How to Seal Every Single Gap and Crack for Maximum Quiet
Your closet door, wall seams, even tiny cracks around outlets—these are sound leaks waiting to happen. Seal them with weatherstripping, acoustic sealant, or door sweeps. For detailed methods, see how to seal gaps effectively.
Sealing these gaps is crucial because sound leaks through even the smallest openings. For instance, if you leave a gap under the door or cracks around electrical outlets, noise can easily escape or enter, defeating your soundproofing efforts. Proper sealing ensures that the effort you put into absorption and placement isn’t wasted by simple leaks.
Don’t rely on generic caulk—use acoustic sealant instead. It stays flexible and doesn’t crack over time. Also, treating the door with a heavy blanket or soundproof curtain blocks the biggest leakage point. Remember, every gap closed improves your room’s isolation, making your setup significantly quieter and more professional.
Placement Matters: Where to Put Absorption and Why
In a tiny room, placement is king. Put absorption panels where sound bounces, especially near the mic and reflective surfaces. This reduces echo and makes your voice sound clearer. You might find placement tips helpful.
For example, placing a foam panel behind your mic and along the wall behind your desk can cut down on early reflections that cause that 'boxy' sound. Covering more surface area—like adding panels on the ceiling and across the side walls—yields better results than a few small pieces.
Focus on the first reflection points—where sound hits your walls first when you speak or record. Use a mirror to find these spots: if you see the mic in the mirror from your position, those are prime locations for treatment. Proper placement ensures that sound waves are absorbed at critical points, reducing echo and improving clarity. This strategic positioning can be the difference between a muddy recording and a professional-sounding track. Remember, the goal is to control reflections at the source, which is why understanding where sound bounces first is essential for effective treatment.
Treat the Door First—It’s Usually the Biggest Leak
The door to your closet is often the weakest point for sound escape. Adding a heavy blanket or a dedicated soundproof door cover can drastically cut down on noise leaks. For more ideas, see door treatment tips.
For instance, someone used a thick moving blanket hung with hooks over their closet door. The difference was dramatic—less outside noise, less echo inside. When treating a small space, don’t forget the door.
For a more permanent fix, consider installing a soundproof door sweep or sealing the edges with acoustic strips. These small investments are crucial because the door is often the easiest and most effective place to block sound from escaping or entering. Properly treating the door creates a significant barrier, making your entire setup more effective and less prone to noise leaks. Remember, the biggest leak is usually the weakest point, so prioritizing door treatment yields the highest gains in sound isolation.
Vibration and Structure-Borne Noise: Reduce Transmission Through Floors and Walls
Noise isn’t just airborne; it travels through the floor and walls as vibrations. If your rig vibrates the desk or the floor, it radiates sound outward. Learn more about reducing vibration transmission.
For example, a hobbyist placed their PC tower on rubber feet and used isolation pads under their monitor. The hum and vibrations dropped by over 50%. This simple step can make a huge difference in a small, echo-prone closet.
If you’re serious, consider a floating desk or decoupling mounts. It’s a bit more involved but worth it in noisy environments. These methods prevent vibrations from transmitting into the structure, which can cause additional noise and resonance. By decoupling your equipment physically from surfaces, you reduce the risk of vibrations radiating outward, which is especially important in confined spaces where sound can easily bounce around. The tradeoff is some extra effort and cost, but the improvement in sound clarity and reduction of structural noise is often well worth it.
Ventilation and Cooling: Keep Your Rig Cool Without Noise
Putting a loud, hot-running rig in a closet? Ventilation is your best friend. Without proper airflow, heat builds up, causing fans to ramp up, which defeats your noise goals.
Use passive vents or, better yet, install quiet exhaust fans that pull hot air out and bring in cooler air. For example, a user built a ducted airflow system with insulated, soundproofed ducts that kept noise low while venting heat.
Proper ventilation isn’t just about keeping your gear cool; it also prevents the fans from working harder and generating more noise. By designing a ventilation system that minimizes sound transmission—such as using insulated ducts or placing fans outside the closet—you can maintain optimal temperatures without sacrificing acoustic performance. This balance is critical because overheating can cause hardware issues, while poor ventilation can introduce unwanted noise. Achieving this equilibrium means your setup stays cool, quiet, and efficient.
Mix and Match: Combining Absorption, Sealing, and Decoupling for Best Results
One trick: don’t rely on just one method. Combine sealing gaps, treating reflective surfaces, and decoupling equipment. It’s like building a layered fortress against noise.
For example, sealing the door, adding foam panels on key reflection points, and placing rubber pads under the rig creates a noticeable silence inside and outside. It’s about covering all bases.
DIY modular treatments—like removable blankets and peel-and-stick panels—make it easy to tweak your setup as needed.
Each method targets a different aspect of sound transmission—airborne noise, reflections, and vibration—and when combined, they create a comprehensive noise barrier. Think of it as building multiple layers of defense; if one layer isn’t enough, the others compensate. This holistic approach maximizes your chances of achieving a quiet, professional-sounding environment, even in the smallest spaces.